


Key Takeaways
- The best detector depends on where you hunt, what you hope to find, and how often you will use it.
- Dry parks, old fields, wet salt beaches, streams, and gold-bearing ground can require different features.
- Coil size, detector weight, waterproofing, and simple controls often matter as much as depth claims.
- Always confirm local rules, landowner permission, and recovery requirements before detecting.
Table of Contents
- Start With the Hunting Goal
- Match the Detector to the Ground
- Learn the Main Detector Technologies
- Choose the Right Search Coil
- Consider Water and Weather
- Set a Realistic Budget
- Check Laws and Permissions
- Build a Simple Field Plan
- Avoid Common Buying Mistakes
- Use the Final Choice Checklist
- Conclusion
Choosing a metal detector is easier when you begin with the places you actually plan to search. A lightweight machine for parks and schoolyards may not be the right choice for wet salt sand, rough fields, or mineralized gold country. Comparing Minelab metal detectors with other options can help shoppers focus on features that match their intended terrain rather than buying based on a single specification.
The right detector should also fit your time and experience level. Someone who hunts for an hour on weekends may benefit from straightforward controls and a comfortable balance. A dedicated relic hunter or prospector may be willing to learn advanced settings in exchange for greater control over ground balance, discrimination, sensitivity, and target response.
Start With the Hunting Goal
First, define the targets that matter most. Coin and jewelry hunters often need useful target identification and separation in trashy parks. Relic hunters may prioritize hearing faint signals among iron. Gold prospectors usually need high sensitivity to very small targets and stable performance in difficult soil conditions. For general family use, low weight, clear tones, and easy assembly are usually more valuable than a long list of advanced adjustments.
There is no single “best” detector for every person. A unit that performs well on a dry lawn can become noisy or unstable on wet salt sand. Buy for your usual hunting conditions, not for the one vacation or special trip you might take once a year.
Match the Detector to the Ground
Ground conditions directly affect what you hear and how confidently you can identify a target. Dry parks usually reward good target ID, recovery speed, and separation around bottle caps, pull tabs, and modern trash. Old home sites and farm fields often contain iron, nails, and uneven terrain, so adjustable discrimination and a smaller coil can be useful.
Wet salt beaches can be especially challenging because conductive sand and changing moisture levels may create false signals. Mineralized soil can also cause a detector to respond to the ground rather than to a buried object. In streams or shallow water, confirm that the entire detector, not just the coil, is rated for the depth and conditions you expect.
Learn the Main Detector Technologies
A basic understanding of detector technology helps separate useful features from marketing language. A metal detector uses a search coil to detect changes caused by nearby metal and then communicates the response through tones, numbers, or visual indicators. The exact response changes with target size, metal type, depth, soil conditions, and sweep technique.
Common options
- Very Low Frequency, or VLF: Common for coins, jewelry, relics, and everyday land hunting. These detectors often provide detailed target information.
- Multi-frequency: Designed to offer flexibility across changing soil, dry ground, and wet beach conditions.
- Pulse induction: Often considered for highly mineralized ground, some beach environments, and specialized prospecting.
Technology cannot replace practice. Learn a detector’s tones, sweep at a controlled speed, begin with moderate sensitivity, and change one setting at a time. A stable, well-running machine will usually outperform a complicated machine running poorly.
Choose the Right Search Coil
The standard coil is often the best place to start. Small coils can separate close targets in iron, brush, rocks, and dense trash. Medium coils provide a practical balance of coverage, handling, and separation for many sites. Large coils cover open ground more quickly, but they can feel heavier and may pick up more ground noise.
Coil shape matters too. Elliptical coils can work well along fence lines and in tighter spaces, while Double-D coils are widely used for broad coverage and difficult soil. Before buying an extra coil, note your typical site size, trash level, target type, and hunt length. An accessory should solve a real problem.
Consider Water and Weather
Water resistance is not the same as full submersion. A waterproof coil does not automatically mean the control box, cable connections, headphones, or battery compartment can go underwater. Check the manufacturer’s stated depth rating before entering a lake, stream, or surf zone.
After beach hunting, remove approved accessories and rinse off salt and sand as directed. Keep charging ports clean and dry, protect batteries from extreme heat or cold, and use headphones suited to your site’s noise level and moisture exposure.
Set a Realistic Budget
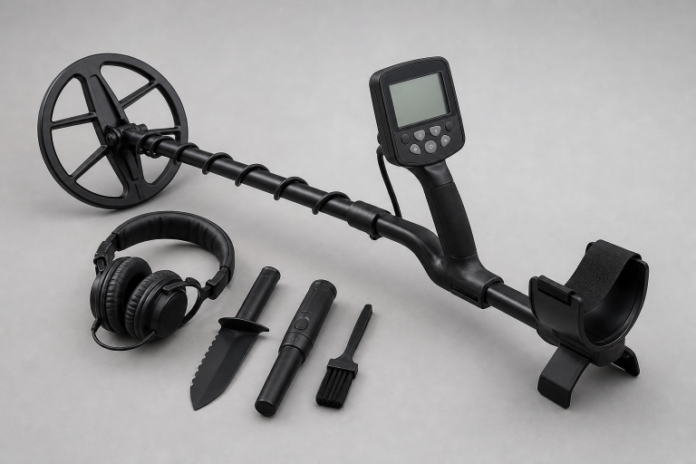
The detector is only part of the setup. Plan for a digging tool, recovery pouch, pinpointer, headphones, coil cover, spare power source, and possibly a protective case. A starter kit can stay simple, but regular hunters usually benefit from a quality pinpointer and sturdy recovery tools.
Spend according to your most common conditions. A comfortable, dependable detector used every week provides more value than an advanced model that feels intimidating or sits in a closet.
Check Laws and Permissions
Permission is part of responsible detecting. Rules vary by state, city, county, beach, park system, and private property owner. Ask before searching private land, check local park regulations, avoid protected historic areas, and understand how local law treats found jewelry, weapons, and potentially historic objects.
National parks are a clear example of why checking first matters. The National Park Service archaeology guidance states that visitors may not metal detect in parks managed by the NPS. When in doubt, contact the land manager before packing your detector.
Build a Simple Field Plan
- Choose a legal location and confirm permission.
- Consider the soil, weather, likely targets, and trash level.
- Pack the detector, pinpointer, headphones, digging tools, pouch, and water.
- Start with moderate settings and test the machine away from obvious metal.
- Dig neat plugs, recover targets carefully, and refill every hole.
- Record productive settings and site notes after the hunt.
Avoid Common Buying Mistakes
- Choosing only by advertised depth.
- Ignoring weight, shaft balance, and arm fatigue.
- Assuming every waterproof claim means underwater use.
- Using advanced settings before mastering basic operation.
- Rejecting every low tone without investigating the site context.
- Buying extra coils before learning the standard coil.
- Skipping permission and local rules.
Use the Final Choice Checklist
- Where will I hunt most often?
- Which targets matter most to me?
- Will I face wet salt sand, water, or mineralized soil?
- Can I comfortably carry this detector for a full outing?
- Is the coil appropriate for my usual sites?
- Do the waterproof rating and controls match my plans?
- Have I checked legal access and permission requirements?
Conclusion
The smartest metal detector choice begins with the ground, targets, and the person using it. Select a machine that fits your normal hunting conditions, learn its standard coil and basic settings, follow local rules, and recover targets neatly. Those habits will do more for successful outings than chasing the most complicated specifications alone.